
A defensible takeoff follows a fixed sequence: review the drawing set and addenda, calibrate scale against a known dimension, configure your measurement structure, measure by trade, apply waste factors, transfer to a structured takeoff sheet, verify with peer review, then export with a revision-controlled audit trail. Anchoring the process to CSI MasterFormat divisions and using an accelerator such as QuantiFlow keeps every quantity traceable back to its source sheet.
TL;DR:
- Reviewing and updating addenda and specifications prevents scope omissions, which are the most common bid disputes and easily avoidable with a checklist.
- Calibrating the drawing scale on every revised sheet ensures measurement accuracy and prevents silent systemic errors throughout the takeoff process.
- Configuring measurement conventions, layers, and units before starting work maintains traceability and avoids costly rework caused by inconsistent data entry.
- Attaching sheet references, revision dates, and structured data to every line during measurement makes post-bid validation straightforward and defensible.
- Employing human checks like coverage audits and peer reviews remains vital to catching errors, even when AI tools automate counting and calculations.
Table of Contents
- What are the correct takeoff workflow steps?
- Which unit should you use for each element type?
- How much waste allowance should you add to each material?
- What makes a takeoff defensible under scrutiny?
- How do you export takeoff data for estimating and procurement?
- What mistakes cause the most rework during takeoff?
- How does QuantiFlow support this workflow in practice?
- What does this workflow look like on a real bid?
- QuantiFlow: built for exactly this workflow
- Sources
What are the correct takeoff workflow steps?
Estimators who skip steps don't save time. They just move the time to the change-order phase, where mistakes cost far more to fix. The seven-step workflow reviewed by Bluebeam, running from review through calibration, configuration, measurement, verification, validation and export, has become the industry benchmark for a reason: each stage catches a specific class of error the previous one couldn't.
Below is the practical, expanded version estimators actually run on live bids, with the waste-factor and transfer stages broken out because that's where most quantity disputes originate.
1. Assemble and review the complete drawing set, specifications and addenda.
Before you touch a scale tool, gather every architectural, structural and MEP sheet, the project manual, and every addendum issued. Autodesk's takeoff guidance puts this review first for good reason: measuring against an outdated sheet produces numbers that are internally consistent and completely wrong. Cross-check the specifications against the drawings, too, because specs frequently override what's shown on the plan itself, particularly around material grade, fire rating and finish schedules.
Missed addenda cause more scope disputes than almost any other single error. Practitioners consistently point to this as the most common source of bid omissions, and it's entirely preventable with a checklist that ties each addendum number to the sheets it modifies.
At this stage, lock your scope and note every exclusion in writing. If a scope boundary is ambiguous, flag it now rather than guessing later. A structured revision-control process gives you somewhere to log these decisions so they don't evaporate between bid day and buyout.
2. Calibrate the drawing scale using a known dimension.
Every PDF or scanned drawing needs calibrating before you measure a single line. Pick a dimension the architect has explicitly called out, a door width, a grid spacing, a column centreline, and check your software's measured value against it. ProjectManager's overview of the takeoff process makes the point plainly: digital tools cut down on arithmetic errors, but they don't replace the judgement needed to catch a mis-scaled sheet, and a single calibration slip introduces a systematic error across every quantity you pull from that page.
Re-check calibration on every revised sheet, not just the first set. Revised drawings are sometimes issued at a different scale or with a different print margin, and an estimator who assumes yesterday's calibration still holds is setting up a silent, compounding error.
3. Configure your measurement system before you measure anything.
Set up your naming conventions, colour-coding and layer structure now, organised by CSI MasterFormat division or your firm's own cost codes. Kamai's step-by-step guidance is explicit that locking this structure before measuring, rather than retrofitting it afterwards, is what keeps a takeoff traceable once it feeds into a bid package or subcontractor scope. A clear work breakdown structure at this stage also makes it far easier to reconcile your takeoff against the estimate later.
Decide your colour-coding scheme by trade, assign a distinct layer to each measurement type, and confirm your unit conventions before the first click. Changing conventions halfway through a takeoff is one of the fastest ways to introduce double-counted or missing quantities.
4. Measure quantities by type, with a sheet reference on every line.
Work through each trade systematically, using the correct unit for the item:
- Count (ea) for doors, fixtures, light fittings and other discrete items.
- Length (lf) for piping runs, conduit, kerbs and linear trim.
- Area (sf) for flooring, roofing membrane, drywall and paint.
- Volume (cy) for concrete, excavation and fill.
Attach a sheet reference and revision date to every single line as you go. This isn't bureaucratic overhead. It's the difference between being able to defend a number six weeks later and having to remeasure the entire drawing set from scratch because nobody can remember which sheet a figure came from.
5. Apply trade-specific waste factors and convert net to order quantities.
Net measured quantity is not what you order. Apply the appropriate waste allowance for each material, document why you chose that percentage, and convert to the order quantity before the figure ever reaches a supplier or a price. The next section covers this in more depth, because it's where estimators most often either double-count or under-allow.
6. Populate the structured takeoff sheet.
Every line needs a consistent set of fields: description, sheet reference, net quantity, waste percentage, order quantity, unit and cost code. A trade-aligned takeoff sheet structured this way, rather than a loose spreadsheet with ad hoc columns, is what lets an estimator, a QS and a procurement lead all read the same document and trust it.
7. Run a visual coverage check and peer review.
Before anything moves toward pricing, scan the marked-up drawing set for unhighlighted areas. Colour-coding makes gaps visible at a glance; anything left uncoloured hasn't been measured, and that's exactly where omissions hide. Route high-cost or unusual items to a second reviewer for sign-off.
8. Export with revision control intact.
Export to CSV or Excel with every field preserved, sheet references included, and a version number attached. If the drawings get revised after export, that export is now a historical snapshot, not a live source, and needs to be marked as such.
Which unit should you use for each element type?
Choosing the wrong unit is a quieter error than a missed addendum, but it compounds just as badly. Get the unit wrong on a high-volume item and every downstream calculation, waste factor and price extension inherits the mistake.
- Each (ea): doors, windows, light fittings, plumbing fixtures, structural columns. Count from the schedule where one exists, not just the plan, since schedules often include items drawn only once but repeated across multiple locations.
- Linear feet (lf): piping, conduit, skirting, kerb and gutter, structural steel by run length. Watch for slope, since a run measured on plan understates true length on a raked or stepped surface.
- Square feet (sf): flooring, ceiling tile, drywall, roofing membrane, paint. Convert to square yards (sf ÷ 9 = sy) when your material or labour rate is quoted per sy, which is common for carpet and resilient flooring.
- Cubic yards (cy): concrete, excavation, fill, aggregate base. Convert cubic feet to cubic yards by dividing by 27, and always confirm whether the spec calls for a compacted or loose measure before you price fill.
- Weight (tons or kg): rebar, structural steel, some aggregate materials priced by mass rather than volume.
Partitions and floor finishes illustrate the schedule-versus-plan question well. A partition schedule will usually list wall types and lengths that are faster and more reliable to total than tracing every wall on the floor plan by hand. Concrete pours are the opposite case: measure directly from the structural drawings and cross-check against the pour-specific guidance for slab thickness, footing depth and any haunching that plan-view measurement alone won't capture.
How much waste allowance should you add to each material?
Waste factors exist because no material goes from delivery to installation without loss, and that loss varies enormously by material, method and site condition. Tile cutting around an awkward room shape wastes more than tile laid across an open floor. Timber framing waste depends on stock lengths versus your actual dimensions.
- Use your own job history as the primary source for allowances, not a generic industry default plucked from a textbook.
- Typical ranges vary by material and installation method, so document the rationale rather than relying on a fixed number applied everywhere.
- Note the specific reason for each allowance directly on the takeoff line: cutting waste, breakage, offcuts, or contractor-standard practice.
- Check for double-counting in layered assemblies, where waste applied at the material level and again at the assembly level inflates the order quantity twice for the same loss.
Pro Tip: Keep a running log of actual waste from completed jobs against what you allowed at bid stage. Within two or three projects per material category, you'll have a far more defensible allowance than any generic rule of thumb.
What makes a takeoff defensible under scrutiny?
A takeoff that can't survive a post-bid query isn't finished, no matter how complete it looks on screen. Validation is what turns a set of numbers into something you can stand behind in a buyout meeting or a dispute.
- Run a visual coverage audit. Colour-coded layers should leave no drawing area unmarked; generate an unchecked-area report and chase down every gap before pricing.
- Apply parametric sanity checks to high-cost items. Cross-checking totals against expected benchmarks is one of the fastest ways to catch a measurement that's badly off. A concrete volume that comes out at half the expected cubic yardage for a slab of that footprint almost always signals a missed pour or a unit error, not an unusually efficient design.
- Complete a peer review checklist. Require sheet references, revision notes and waste rationale on every reviewed line before sign-off is granted.
- Preserve the audit log. A documented revision history that ties each quantity to its source sheet and date is what protects an estimator when a subcontractor challenges a figure months after the bid closed.
AI-assisted extraction tools speed up counting and area calculation considerably, but they still struggle with atypical assemblies and context-dependent scope. That's precisely why the visual coverage check stays a mandatory human step, not an optional one, regardless of how much of the counting was automated.
How do you export takeoff data for estimating and procurement?
An export that forces someone downstream to re-key data has failed at its one job. Every export should carry:
- Sheet reference and revision date for every line
- Net quantity and the waste percentage applied
- Order quantity and its unit
- Cost code aligned to your CSI MasterFormat structure
CSV and Excel remain the most portable formats, and mapping columns directly to your estimating template's import fields avoids manual re-entry errors. For structured BoQ output with a human sign-off step preserved, keep exports snapshot-dated rather than live-linked wherever the drawings might still change; a live link is convenient until a revision lands and silently alters a number your estimator already priced. If procurement teams need to move straight from quantities into supplier quotes, a dedicated quoting workflow can pick up cleanly from a well-structured export.
What mistakes cause the most rework during takeoff?
The same handful of errors account for most of the rework estimators see. Missing addenda tops the list, closely followed by unverified scale calibration and mixed units carried through a spreadsheet without anyone noticing the inconsistency.
- Skipping addenda review, which reintroduces the scope-omission risk the whole process is designed to prevent.
- Trusting scale on a revised sheet without re-checking it against a known dimension.
- Mixing units within one takeoff line, particularly sf and sy on flooring items.
- Treating ambiguous specifications as settled without flagging them for design-team clarification.
- Skipping the coverage check because deadline pressure makes it feel optional.
Pro Tip: Measure your highest-cost, highest-risk items first, structural concrete, MEP risers, curtain wall, while your attention is sharpest, then leave repetitive low-risk counting for later in the day when concentration naturally dips.
Always attach sheet references before moving to the next item, never in a batch at the end. Run the coverage check as a hard gate before export, not as an optional last step if time allows.
How does QuantiFlow support this workflow in practice?
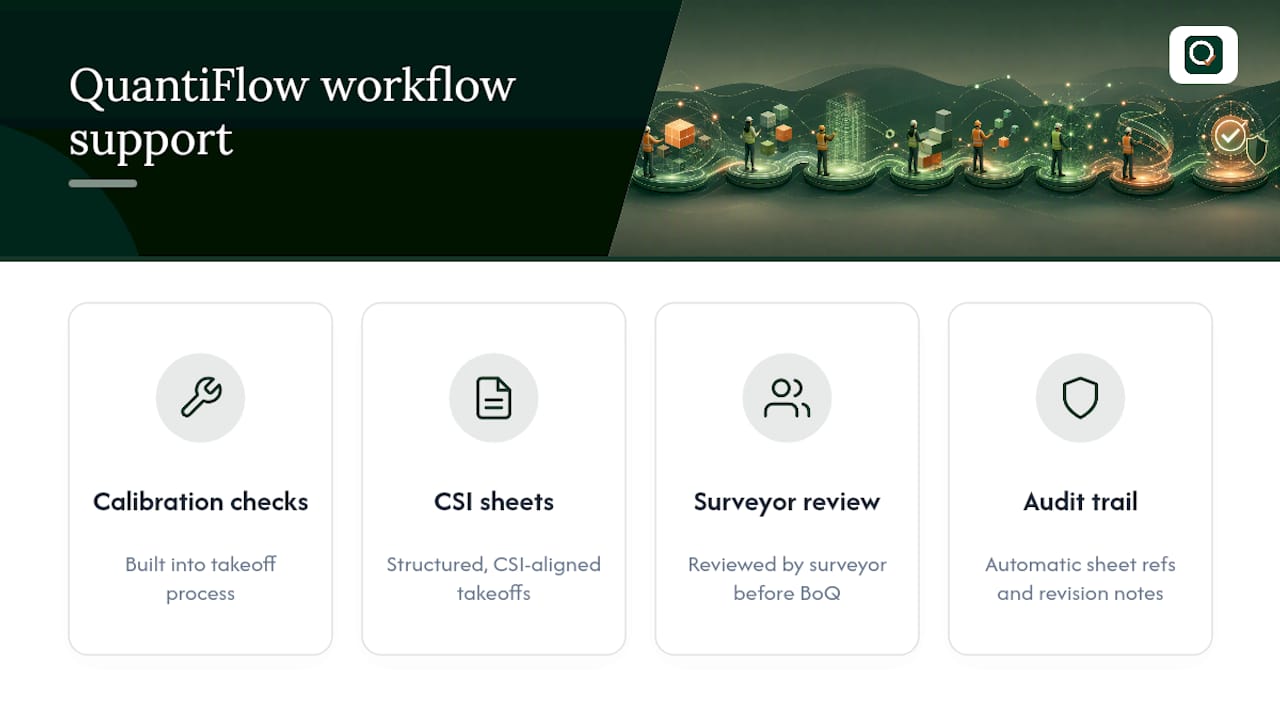
The workflow above only holds up if the tooling behind it respects every stage rather than shortcutting the ones that feel slow. QuantiFlow builds calibration checks, structured CSI-aligned takeoff sheets and audit logging directly into the process, so the scale-verification and traceability steps aren't extra admin bolted on afterwards; they're native to how a takeoff gets built.
Quantities extracted from drawings still route through the surveyor for review before they become priceable BoQ lines, which keeps professional judgement in the loop exactly where the validation guidance above says it belongs. Every measurement carries its sheet reference and revision note automatically, so the audit trail an estimator needs for a buyout query or a post-bid dispute already exists rather than needing to be reconstructed after the fact.
For deeper, discipline-specific detail on structuring quantities by work breakdown or handling revision control at scale, the QuantiFlow resource library covers software selection and integration patterns for firms scaling this workflow across multiple bids.
What does this workflow look like on a real bid?

On a small commercial fit-out, the drawing set arrived with two addenda still pending clarification from the architect, so review came first and took longer than expected: nearly a full morning chasing down which sheets each addendum actually touched.
Structural concrete and the rooftop MEP risers got measured first, while attention was sharpest, and both were flagged for peer review given their cost weight. The audit log later proved useful when a subcontractor queried a linear footage figure on the piping schedule; the sheet reference and revision date attached to that line settled the question in minutes rather than triggering a full remeasure.
— Michael
QuantiFlow: built for exactly this workflow
QuantiFlow turns the eight-step process above from a manual discipline into something your software actively enforces. It uses AI to cross-reference drawings against specifications, assists with scale calibration on every revised sheet, and generates NRM2-aligned Bills of Quantities with an audit log attached to every line, all while leaving final pricing judgement with the quantity surveyor rather than the algorithm.

Pricing runs from a Solo plan suitable for individual surveyors, through a Business tier for small teams needing multi-role collaboration, up to a custom Enterprise tier for larger firms with higher volume. If you're currently rebuilding takeoff sheets by hand every time a revision lands, visit the QuantiFlow landing page and start a trial to see how much of the review, calibration and export burden it can carry for your next bid.
Sources
- Seven steps to a defensible takeoff | Bluebeam blog
- Construction Takeoffs: A Complete How-To Guide | Autodesk
- How to Perform a Construction Takeoff: The 7-Step Process | Acon Engineering
- Construction takeoff process overview | ProjectManager
- How to do a construction takeoff step by step | Kamai