
A usable concrete quantity takeoff delivers three things: measured volumes in cubic metres (m³), any required formwork area, and a verified order quantity or BoQ line ready for pricing. Get those three right and your bid is defensible; miss any one of them and you are pricing on guesswork. The industry term for this process is a "quantity takeoff" or "quantity take-off," and in the UK it sits within the measurement framework set by NRM2.
The three actions that underpin every reliable takeoff:
- Measure: Extract dimensions from scaled drawings, confirm the drawing scale, and record each element by location and type.
- Calculate: Apply the correct volume formula for each shape, convert to m³, and multiply by element count.
- Allow and verify: Add a waste/overage allowance (typically ranging from low to moderate percentages), cross-check totals against the drawings, and flag any ambiguous details for professional judgement before pricing.
When drawings are incomplete, contradictory, or show non-standard details, escalate to a qualified quantity surveyor before committing to an order quantity or BoQ line.
Key takeaways
A reliable concrete quantity takeoff requires measured m³, a recorded waste allowance, and a verified order quantity before any pricing or ordering begins.
| Point | Details |
|---|---|
| Measure in metres from the start | Convert all drawing dimensions to metres before calculating to avoid unit mix-up errors. |
| Apply a waste allowance typically ranging from low to moderate percentages | Use 10% for footings and rough excavations; 5% for well-formed slabs with tight formwork. |
| Round up to supplier increments | Never order the exact calculated volume; round up to the nearest ready-mix delivery increment. |
| Run the QA checklist before pricing | Verify scale, cross-sheet counts, units, and formwork separation on every takeoff. |
| Quantiflow automates NRM2-aligned takeoffs | The platform extracts geometry from PDF drawings and exports auditable BoQ output from £39/month. |
Table of Contents
- How do you carry out a concrete quantity takeoff from drawings?
- Core volume formulas and a worked metric example
- Quick shape reference for calculators and spreadsheets
- Allowances, rounding and ordering practice for UK projects
- Which method should you use: manual, spreadsheet, or automated takeoff?
- How do you verify a concrete takeoff before pricing or ordering?
- A ready-to-use takeoff checklist and spreadsheet template
- How Quantiflow fits an NRM2-aligned takeoff workflow
- The one takeoff habit that prevents the most expensive mistakes
- Quantiflow: faster NRM2-aligned takeoffs without the manual grind
- Sources
How do you carry out a concrete quantity takeoff from drawings?
A concrete quantity takeoff is a measured-quantities exercise, distinct from the estimate that follows it. As RIB Software explains, the takeoff produces quantities only; the estimate applies unit rates to those quantities to produce a monetary bid. Keeping those two stages separate is what makes your numbers auditable and your pricing defensible.
Follow these steps on every project:
- Prepare drawings and confirm scale. Gather all relevant drawing sheets (plans, sections, details). Confirm the printed scale matches the title block. If working from a PDF, verify the scale bar against a known dimension before measuring anything.
- Identify all concrete pours and sequences. Mark up each pour by type (slab, strip footing, pad footing, column, wall, stair) and record the drawing sheet reference. Note any phased pours or construction joints that affect ordering.
- Measure each shape. Pull length, width, thickness, or diameter from the drawings. Record raw dimensions in a spreadsheet before converting. Digital takeoff tools import PDFs and measure automatically, reducing arithmetic errors and creating an auditable record.
- Apply conversion and waste. Convert dimensions to metres, calculate volume in m³, then apply your waste allowance. Record the waste percentage as an assumption.
- Compile totals. Sum volumes by pour type, then produce a grand total. Where NRM2 requires separate measurement of formwork, record form area (m²) alongside volume.
- Convert to order units or BoQ lines. Round up to the nearest 0.25 m³ for ready-mix ordering, or to whole bags for small pours. Format BoQ lines per NRM2 rules, noting any provisional sums for elements with insufficient drawing information.
Assumptions to record with every takeoff:
- Drawing scale and revision number used
- Unit system (all dimensions in metres)
- Whether reinforcement is included or excluded from the volume (standard practice: excluded; covered by waste allowance)
- Waste percentage applied and reason for choice
- Site conditions affecting over-excavation or formwork tolerances
- Whether ready-mix or bagged concrete is assumed
Core volume formulas and a worked metric example
The geometry is straightforward once you commit to consistent units. Calculator and similar tools use the same underlying formulas; understanding them lets you spot-check any automated output.
Key formulas
| Shape | Formula | Notes |
|---|---|---|
| Rectangular slab / wall / strip footing | L × W × T | All dimensions in metres; T = thickness |
| Pad footing (square) | L × W × D | D = depth of footing |
| Cylinder (round column / pier) | π × r² × H | r = radius in metres; H = height |
| Stairs | Sum of individual sections | Split each tread/riser into a rectangular solid |
Unit conversions to keep handy:
- 1 inch = 0.0254 m
- 1 foot = 0.3048 m
- 1 cubic foot = 0.0283 m³
- 1 cubic yard = 0.7646 m³
- 1 m³ = 1,000 litres
ConcreteNetwork's guidance uses length × width × thickness and divides cubic feet by 27 to reach cubic yards; the metric equivalent simply keeps everything in metres from the start, which removes that conversion step entirely.
Worked example: ground-floor slab
Given: A ground-floor slab 8.5 m long × 6.0 m wide × 150 mm thick.
- Convert thickness: 150 mm = 0.150 m
- Calculate volume: 8.5 × 6.0 × 0.150 = 7.65 m³
- Apply an allowance for waste commonly applied around 10%: 7.65 × 1.10 = 8.415 m³
- Round up for ready-mix order: an order quantity rounded appropriately to accepted increments (to the nearest 0.5 m³ minimum load increment)
That rounding step is not optional. ConcreteNetwork explicitly advises ordering slightly more than the calculated volume to avoid short deliveries on site.
Quick shape reference for calculators and spreadsheets
Knowing which dimension to pull from the drawing is half the battle. CalculatorSoup's concrete calculator handles all of these shapes and documents the step-splitting method for complex geometry.
- Slab: Measure plan length and width from the structural drawing; read slab thickness from the section or specification. Thickness is almost always in millimetres on UK drawings.
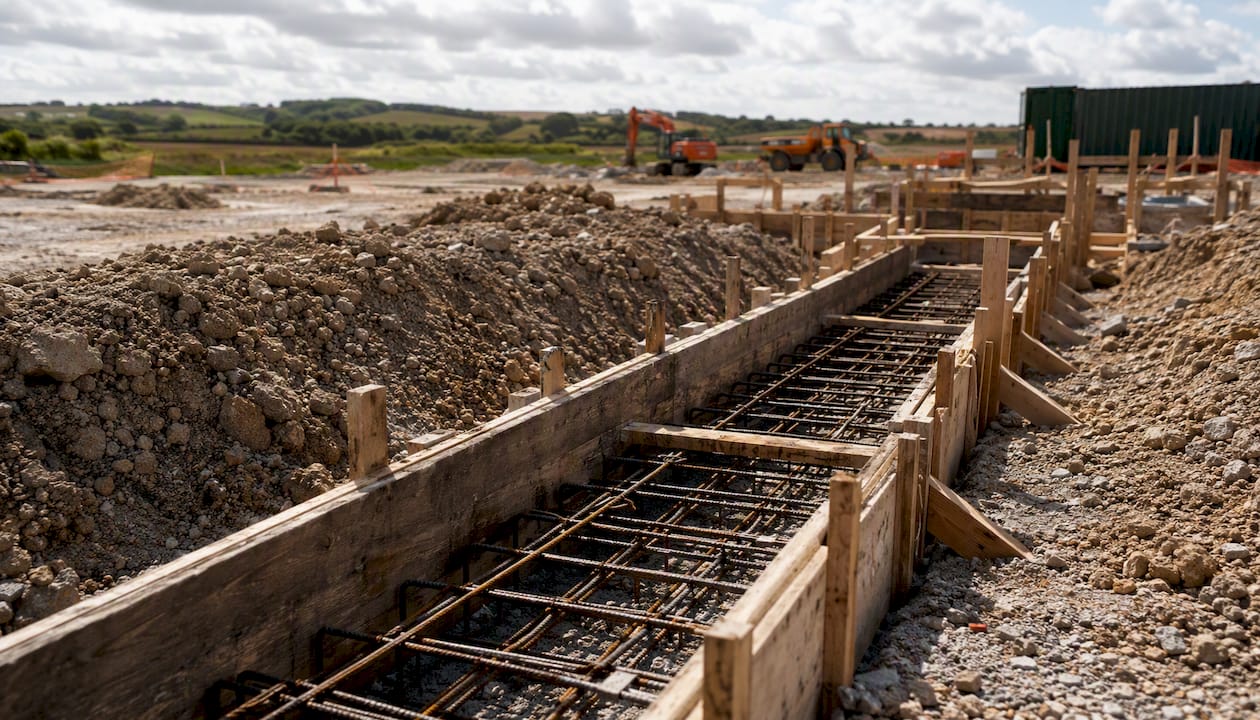
- Strip footing: Measure the total run length along the centreline; read width and depth from the foundation section detail.
- Square/rectangular pad footing: Read plan dimensions (L × W) and depth from the section. Multiply by the number of identical pads.
- Round column or pier: Read the diameter from the structural schedule; halve it for radius. Read height from the elevation or section.
- Wall: Measure plan length; read height from the section and thickness from the structural specification.
- Curbs and steps: Split into individual rectangular sections (tread, riser, base) and sum the volumes. CalculatorSoup documents this approach explicitly for stepped geometry.
L-shaped or irregular slabs: Split into two or more rectangles at a convenient break line, calculate each rectangle separately, and total the volumes. Record each split as its own line in the takeoff.
Counting identical elements: Calculate the volume of one element, then multiply by the count. Rebar and mesh displacement is small relative to total volume and is conventionally covered by the waste allowance rather than deducted separately.
Allowances, rounding and ordering practice for UK projects
Getting the volume right is only part of the job. How you round and what allowance you add determines whether the pour completes without a shortfall or a costly second delivery.
Waste and overage allowances
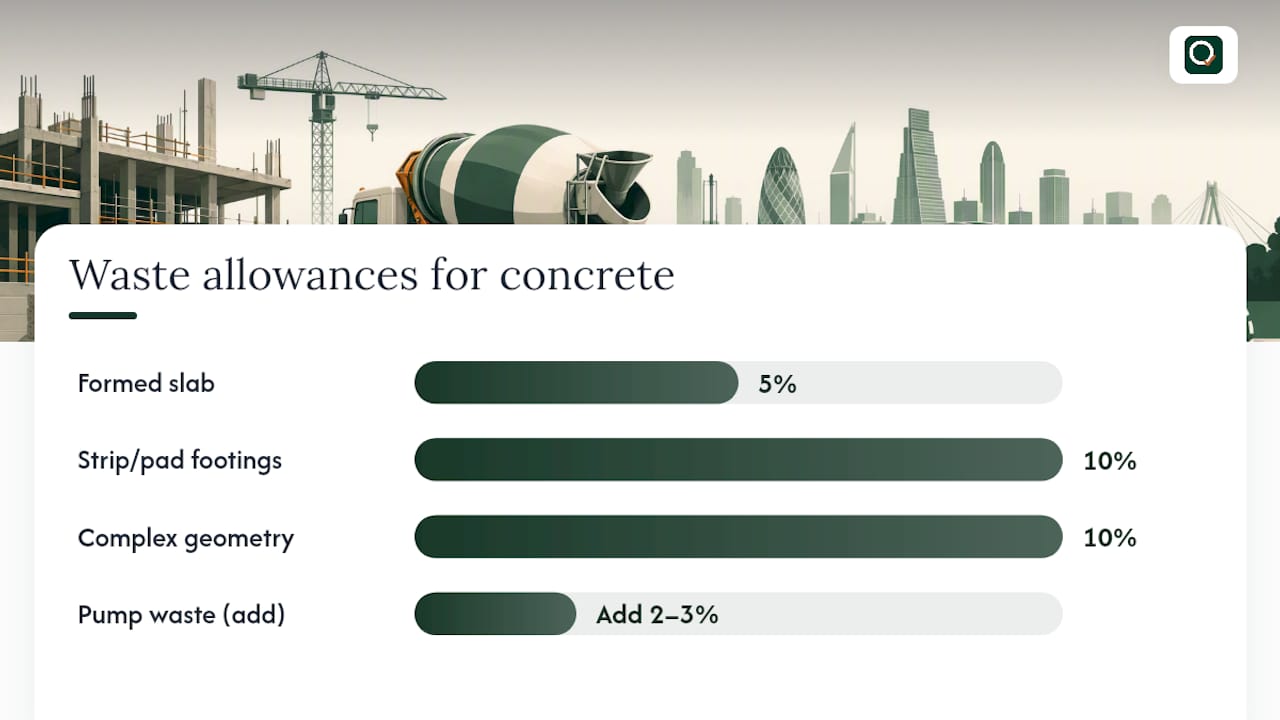
HardHatCalc recommends a waste allowance typically ranging from low to moderate percentages, with 10% as the default. The lower end suits well-formed small slabs with tight formwork; the higher end applies to footings in rough excavations, stepped profiles, or any pour where over-excavation is likely.
| Scenario | Recommended allowance |
|---|---|
| Formed slab, controlled substrate | 5% |
| Strip or pad footings, rough excavation | 10% |
| Complex geometry, steps, or curved formwork | 10% |
| Pump-placed concrete (additional pump waste) | Add 2–3% on top |
Bags versus ready-mix
For small pours, bagged mixes are practical. The decision point is roughly 1 m³ (approximately 0.8–1 cubic yard). HardHatCalc notes that 45 × 80 lb bags yield approximately 1 cubic yard; mixing that volume by hand can be time-consuming and costs more in labour than a ready-mix delivery. Above 1 m³, ready-mix is almost always the right call for UK projects.
QUIKRETE's calculator rounds bag counts up to the next whole bag and notes that yields are approximate, making no allowance for uneven substrate or unexpected waste. Always communicate your rounding method and waste percentage to the site team so there are no disputes when the order arrives.
For residential projects, ready-mix suppliers in the UK typically have a minimum delivery of 0.5 m³ or 1 m³. Factor that minimum into your order quantity and round up to the nearest supplier order increment or delivery minimum, not just to the nearest 0.1 m³.
Which method should you use: manual, spreadsheet, or automated takeoff?
The right tool depends on job size, complexity, and how often you repeat similar takeoffs. Understanding the benefits of quantity surveying software helps frame the decision clearly.
Manual (scale rule and paper):
- Works for very small, simple pours where a single measurement is needed quickly
- No audit trail; prone to transcription errors; not suitable for BoQ production
- Acceptable for a single pad footing or a small repair; not for a multi-element project
Spreadsheet or CAD-based:
- Reliable for small to medium residential projects where shapes are regular
- Requires the estimator to build and maintain formulas; errors propagate silently if a cell reference breaks
- Good for firms that run similar project types repeatedly and can reuse a validated template
Automated digital takeoff:
- Digital takeoff tools import PDFs, measure automatically, and update totals in real time, separating quantity production from pricing so estimators can review numbers before costing begins
- Creates an auditable trail of measurements and assumptions, which is valuable for NRM2-aligned BoQ production and dispute resolution
- Worth adopting for any project with more than a handful of concrete elements, or where the same drawing set is measured repeatedly
Pro Tip: *Whatever method you use, spot-check at least two calculated volumes manually before finalising the takeoff. Pick one simple rectangle and one cylinder or irregular shape.
How do you verify a concrete takeoff before pricing or ordering?
Verification is where errors get caught before they become costly. A second pass takes minutes; a short delivery or a re-order costs far more.
QA checklist:
- Scale check: Confirm the drawing scale matches the title block on every sheet used. A single misread scale invalidates all measurements from that sheet.
- Cross-sheet totals: Verify that element counts on the plan match the schedule or specification. A column schedule showing 12 pads should match 12 pad volumes in your takeoff.
- Unit check: Confirm every dimension is in metres before calculating. A thickness entered as 150 instead of 0.150 produces a volume 1,000 times too large.
- Reinforcement and formwork: Confirm whether formwork area is required as a separate BoQ line. Confirm rebar is excluded from the concrete volume.
- Second estimator cross-check: Have a colleague verify at least the three largest volume items. Most pricing errors originate in the largest pours, so that is where peer review delivers the greatest risk reduction.
Common errors that cause the largest costing mistakes:
- Mixing units (millimetres and metres in the same formula)
- Forgetting overdig depth on trench footings, which increases the volume of blinding or lean-mix concrete
- Measuring formwork contact area and entering it as a volume
- Misreading a section detail and using the wrong thickness (e.g. reading a cover dimension as the slab thickness)
- Failing to multiply a single-element volume by the element count
A ready-to-use takeoff checklist and spreadsheet template
Print this checklist and work through it on every project before releasing quantities for pricing or ordering.
- Gather all drawing sheets; confirm revision numbers and scales.
- Mark up every concrete element by type and location.
- Record raw dimensions from drawings (do not convert yet).
- Convert all dimensions to metres.
- Apply the correct formula for each shape; record the calculation.
- Multiply single-element volume by element count.
- Sum volumes by pour type.
- Apply waste allowance; record the percentage and reason.
- Round up to supplier order increments.
- Run the QA checklist (scale, cross-sheet, units, formwork, peer review).
- Record all assumptions (scale, units, waste%, reinforcement exclusion, site conditions).
- Format BoQ lines per NRM2 or export to Excel/PDF for pricing.
Recommended spreadsheet column headings:
Sheet Ref | Location | Shape | Length (m) | Width/Diameter (m) | Thickness/Height (m) | Qty | Unit Vol (m³) | Total Vol (m³) | Waste % | Order Qty (m³) | Notes/Assumptions
Save each version with a date stamp and revision number. Record your assumptions in the Notes column, not in a separate document that can become detached from the takeoff. When drawings are revised, create a new version rather than overwriting the original.
How Quantiflow fits an NRM2-aligned takeoff workflow
Automating the measurement stage is where the biggest time savings occur on multi-element projects. Quantiflow is built specifically for this workflow.
What Quantiflow does in a concrete takeoff context:
- Imports PDF architectural and structural drawings directly
- Extracts geometry automatically and cross-references dimensions across sheets
- Produces NRM2-aligned quantity outputs ready for BoQ formatting
- Exports to Excel and PDF for pricing, client delivery, or audit
- Logs every measurement, assumption, and override in an auditable trail
The platform does not remove professional judgement from the process. Where drawing details are ambiguous or site conditions require an override, the estimator records that decision in the system. AI and professional judgement work together rather than in opposition: the tool handles repetitive geometry extraction; the QS handles interpretation.
Pricing tiers run from Solo at £39/month through Business at £149/month to custom Enterprise, making it accessible for SME practices as well as larger firms. A free trial is available to test the workflow on a live project before committing.
The one takeoff habit that prevents the most expensive mistakes
Most takeoff errors are not formula errors. They are assumption errors, specifically the assumption that the drawing shows what is actually on site.
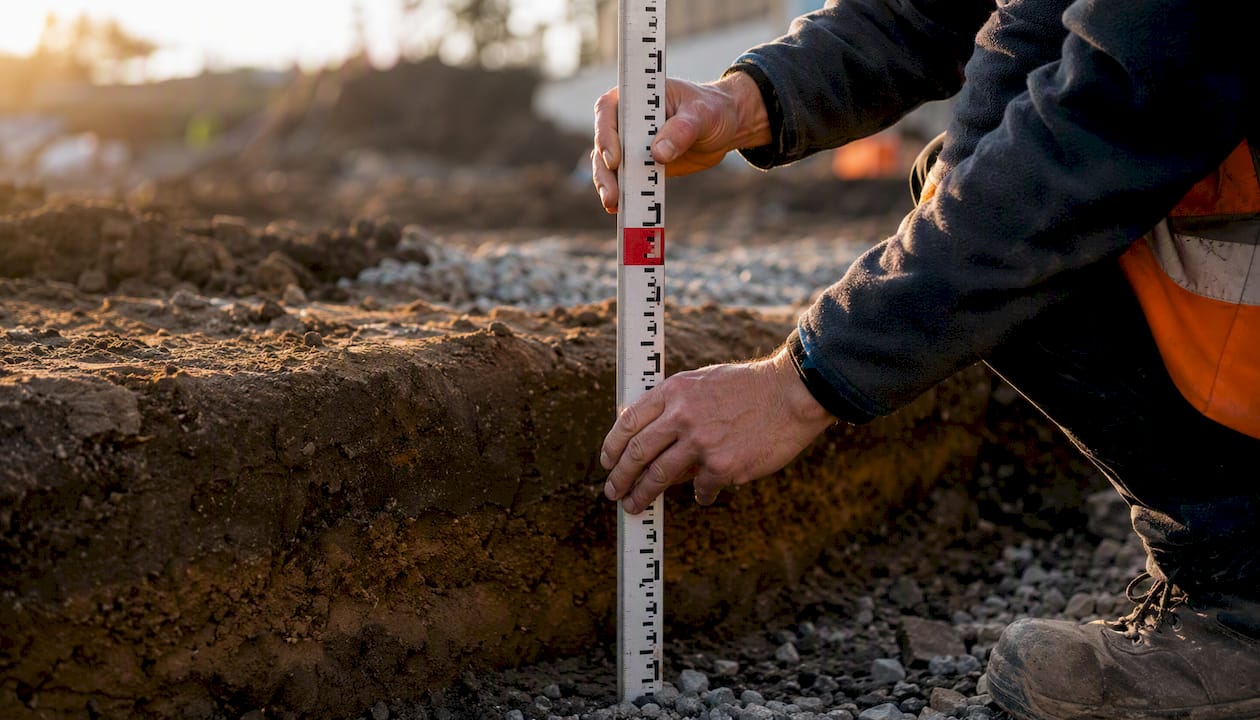
Trench depth is the clearest example. A strip footing drawn at 600 mm deep may have been excavated to 750 mm on site because the ground conditions required it. If you order concrete based on the drawing depth, you will be short. The fix is simple: before finalising the order quantity for any below-ground element, confirm the actual excavated depth with the site manager or groundworks contractor. Add that confirmed depth to your takeoff as a recorded assumption, not a mental note.
The same principle applies to over-excavation around pad footings and to any pour where the substrate is not a formed surface. The drawing shows the design intent; the site shows the reality. Your takeoff should reflect the latter, with the former as the baseline and the difference recorded as an assumption. That single habit, confirming below-ground dimensions before ordering, catches more costly shortfalls than any formula check.
Quantiflow: faster NRM2-aligned takeoffs without the manual grind
Measuring concrete volumes from drawings manually is reliable when the project is small and the geometry is simple. On anything larger, the repetitive measurement work is where time gets lost and errors creep in.

Quantiflow automates that measurement stage. Upload your PDF drawings, and the platform extracts geometry, cross-references dimensions across sheets, and produces NRM2-aligned quantities ready to price. Every measurement is logged, every assumption is recorded, and the output exports directly to Excel or PDF. The result is a traceable, auditable takeoff that meets UK BoQ standards without the hours of manual scaling.
Plans start at £39/month for solo practitioners and £149/month for teams. Start a free trial at Quantiflow and run it against a live project: upload a drawing set, check the extracted volumes against two manual calculations, and judge the fit for your workflow.
Sources
Use these references to verify calculations and stay aligned with UK measurement standards.
For contractual BoQ production, always use NRM2 as the primary measurement standard and record which calculator or tool was used for each volume check. UK suppliers and clients expect NRM2-aligned descriptions; a calculator that uses cubic yards rather than cubic metres should be converted before the figure enters a BoQ line.