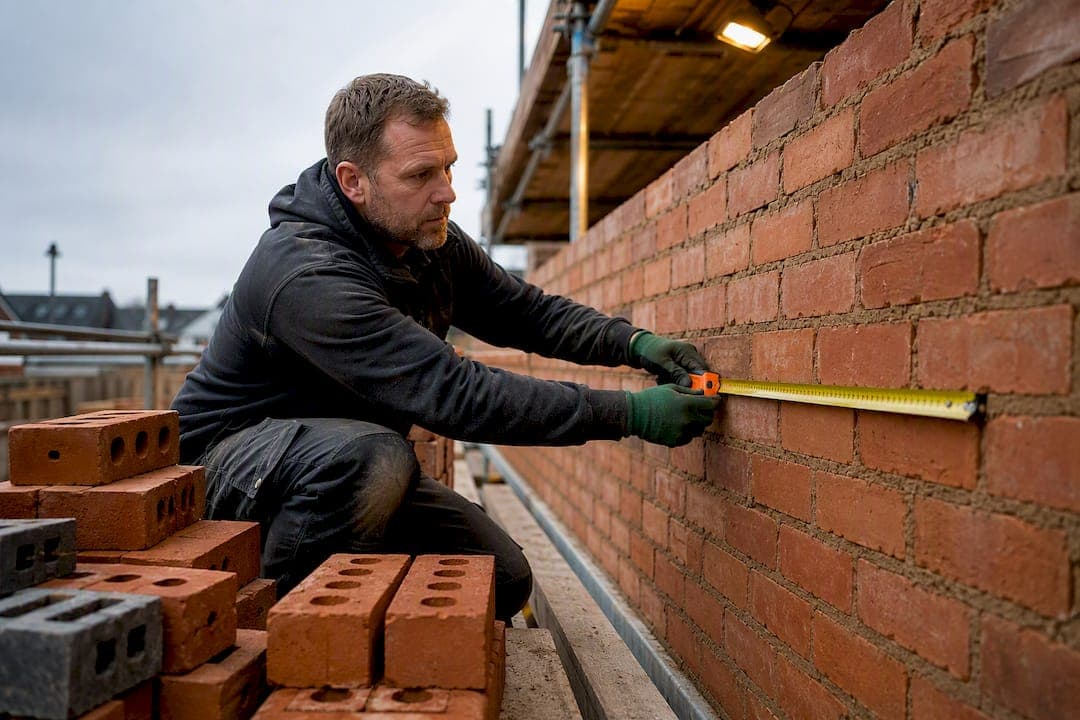
The standard rule of thumb is 60 bricks per square metre for a half-brick wall built with standard metric bricks and a 10 mm mortar joint, according to Mix Design Calc's brick calculator guidance. Start by measuring the gross wall area (length × height), subtract every door and window opening to get the net face area, then apply that 60/m² figure. Add a wastage allowance before rounding up to whole bricks and pallets.
TL;DR:
- For a standard half-brick wall with a 10 mm joint, expect 60 bricks per square meter of net face area, after subtracting openings.
- Wastage allowances are typically 10% for most domestic projects, but can rise to 15% for intricate details or heavily decorative work.
- Round your total brick needs up to full pallets, usually 400 to 480 bricks per pallet, and confirm with suppliers for delivery, storage, and batch consistency.
- Mortar volume approximates 0.022 to 0.03 cubic meters per square meter of brickwork, translating to about one 25 kg cement bag per 40 to 50 bricks, with a safety margin.
- For larger or more complex projects, use drawing-based tools like QuantiFlow for more reliable takeoffs, but always verify key measurements and assumptions manually.
Table of Contents
- How do you calculate brickwork quantities from measurements?
- Brick formats and how many you need per square metre
- Working out openings, reveals and awkward details
- Wastage percentages and rounding orders to pallets
- Converting bricks to mortar: bags of cement and sand
- Worked example: from wall measurement to final order
- When a calculator is enough and when a full takeoff earns its keep
- Considerations for different mortar types and their impact on quantities needed
- Tips for factoring in breakage or damage during transportation and handling
- QuantiFlow: a professional route for drawing-based takeoffs
- Sources
- FAQ
How do you calculate brickwork quantities from measurements?
Working out how many bricks to order follows a fixed sequence, whether you're doing it on the back of a delivery note or checking a supplier's calculator output.
- Measure the gross wall area. Take length × height in metres for each elevation. Brickwork is conventionally measured in square metres of wall face area, and NRM measurement guidance treats this as the standard unit for scheduling masonry work.
- Subtract openings. Deduct the area of every door, window and other opening to arrive at the net face area. Skip this step and you'll over-order, sometimes by a significant margin on elevations with large glazing.
- Apply the bricks-per-m² figure for your bond and brick size. For a standard metric half-brick wall with a 10 mm joint, that figure is 60/m². A full-brick (one-brick) wall doubles it to 120/m², because you're laying two skins of brick rather than one.
- Multiply and add wastage. Net area × bricks/m² gives your raw brick count. Add your chosen wastage percentage, then round up to the nearest whole brick, and finally to a whole pallet.
The 60/m² figure isn't arbitrary. It comes from the coordinating size of a standard UK brick (215 × 102.5 × 65 mm laid with a 10 mm joint gives a coordinating size of 225 × 112.5 × 75 mm), which fits 60 times into a square metre of wall face when laid in standard stretcher bond.
Brick formats and how many you need per square metre
Not every brick on a UK site is the standard metric format, and the bricks-per-m² figure shifts with both size and joint thickness. A thicker joint means fewer bricks per course over the same height, so the count per square metre drops slightly even though the brick itself hasn't changed.
Use the 8 mm figure only where the specification or a heritage-matching brief calls for a fine joint, and the 12 mm figure for coarser rustic-style pointing. For everyday domestic work, stick with the 10 mm, 60/m² baseline unless drawings state otherwise.
Working out openings, reveals and awkward details
Doors, windows and decorative brickwork all eat into your straightforward length × height sum, and getting this step wrong is the most common source of a wrong order.
- Calculate each opening as height × width and subtract it from the gross elevation area before applying bricks/m².
- On a cavity wall, remember the inner leaf reveal around an opening sometimes needs adding back in, depending on whether your specification wants both leaves measured or a combined figure. NRM measurement guidance treats the external leaf face as the primary measured face for most schedules, with reveals and returns handled according to the individual specification.
- Soldier courses, brick arches and decorative returns all involve more cutting than a straight run, so budget a higher wastage percentage for those sections specifically rather than blending them into the whole-wall average.
- Measuring from drawings is faster, but always check the drawing's stated scale and any dimension notes before trusting a scaled measurement over a site check.
Pro Tip: Measure arches and soldier courses as separate line items with their own wastage allowance, rather than folding them into the main wall calculation. It stops one fiddly section quietly eroding your accuracy on an otherwise simple job.
Wastage percentages and rounding orders to pallets
How much extra you add on top of the raw calculation depends on how forgiving the wall is. A long straight garden wall with no openings behaves very differently from a gable end full of arches.
- 5% wastage suits long, straight runs with few or no openings, such as boundary walls or simple gable elevations.
- 10% wastage is the typical figure for standard domestic brickwork with doors and windows, and it's the allowance recommended by Mix Design Calc and reinforced by Build Journal's mortar and brick guidance as a sensible default.
- 15% or more is worth budgeting for arch-heavy or ornate detailing, where cutting losses climb fast.
Brick pallets commonly hold several hundred bricks depending on manufacturer, per Build Journal, so round your final figure up to a whole pallet and confirm the exact pallet count with your supplier before placing the order. Check delivery vehicle access, the offload method (crane-off, forklift, or hand-carried), on-site storage space, and that any additional order later matches the same brick batch for colour consistency.
Converting bricks to mortar: bags of cement and sand
Once you know your brick count, mortar follows a similar logic, just with a different set of trade rates. Typical UK trade calculators put mortar consumption at roughly 0.022 m³ per m² for half-brick work and closer to 0.03 m³ per m² for solid one-brick walls, according to TradeCalculator's mortar guidance.
- Per 1,000 bricks, expect around 0.5 to 0.6 m³ of mortar, again per TradeCalculator.
- As a bags-and-sand rule of thumb, roughly one 25 kg bag of cement covers 40 to 50 standard bricks in a typical 1:4 or 1:5 mix, according to Squote's mortar quantities guidance.
- Always round up rather than down, since a mortar shortfall stops bricklaying dead on site, whereas a small surplus is cheap insurance.
Mortar heuristics like "bags per 1,000 bricks" vary with mix ratio and sand yield assumptions, so treat them as trade rules of thumb rather than fixed standards, and build in a margin.
For a small extension, site-batching with bagged cement and loose sand is usually more economical. On larger jobs, bulk or pre-mixed silo mortar starts to pay for itself once you're above a few thousand bricks, mainly through reduced labour mixing time and fewer wasted part-bags.
Worked example: from wall measurement to final order
Here's a single elevation carried through the whole process, from tape measure to delivery note.
- Measure the gross area. A garden-facing wall runs 8 m long and 2.4 m high: 8 × 2.4 = 19.2 m².
- Subtract the opening. One window measures 1.2 m × 1.2 m = 1.44 m². Net area = 19.2 − 1.44 = 17.76 m².
- Apply bricks per m². This is a standard half-brick wall with a 10 mm joint, so 17.76 × 60 = 1,065.6 bricks.
- Add 10% wastage. 1,065.6 × 1.10 = 1,172.16, rounded up to 1,173 bricks.
- Round to pallets. At 450 bricks per pallet, that's 2.6 pallets, so order 3 full pallets (1,350 bricks).
- Convert to mortar. 1,173 bricks at roughly 0.5 to 0.6 m³ per 1,000 bricks gives approximately 0.59 to 0.7 m³ of mortar.
- Convert to cement bags. At around one bag per several dozen bricks, that's roughly two dozen bags of 25 kg cement, rounded up to 30 bags to be safe.
Final order: several pallets of standard bricks and around 30 bags of cement, plus sand ordered by the tonne to match your chosen mix ratio and mortar volume.
When a calculator is enough and when a full takeoff earns its keep
A quick online calculator, like the checks available on Jewson's brick calculator, is genuinely fine for a single straightforward elevation with one or two openings. It's a sensible sanity check even on bigger jobs.
Where a project has multiple elevations, complex returns, or needs a formal bill of quantities rather than a rough order figure, a drawing-based takeoff becomes the more reliable route. This is the gap tools like QuantiFlow sit in: it reads construction drawings and produces a draft bill of quantities for a quantity surveyor to review and sign off, rather than replacing that review.
- Cross-check at least one or two key elevations by hand before trusting any calculator or drawing-based output.
- Verify the brick format and joint thickness assumptions baked into the tool match your specification.
- Always add a site wastage allowance on top of whatever figure a tool produces.
Pro Tip: Whichever method you use, keep your net area workings on file alongside the final order. It's the fastest way to explain a variance to a client or contractor months later.
Considerations for different mortar types and their impact on quantities needed
The mortar mix you specify changes more than just strength; it can shift the volume you need and how forgiving the material is on site. A 1:4 cement to sand mix, common for general brickwork, behaves differently in terms of workability and coverage than a softer 1:5 or 1:6 mix often used with older or softer bricks to avoid cracking.
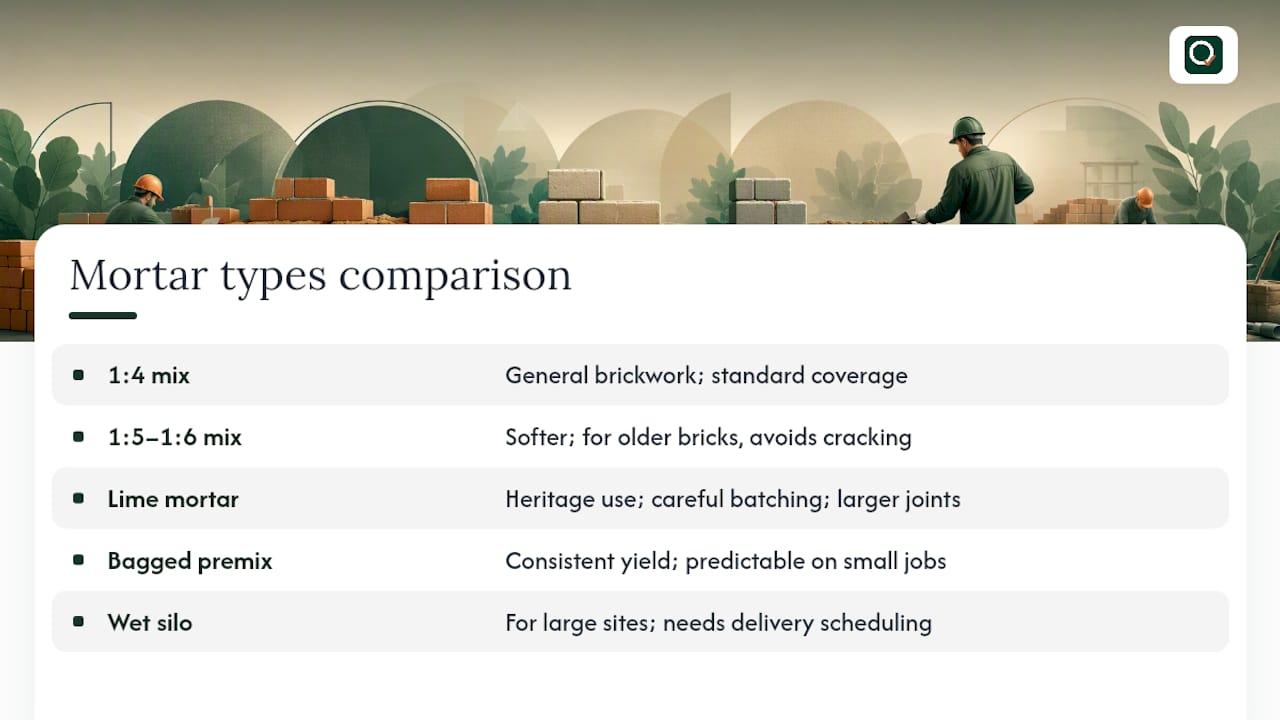
Lime mortars, frequently specified for heritage or listed buildings, typically need more careful batching and often a slightly different volume allowance than a straight cement mix, since lime mortar cures more slowly and is usually laid with more generous joints to accommodate slight brick irregularities. If you're working to a conservation specification, check the joint thickness stated in the drawings rather than assuming the standard 10 mm figure, because it directly changes your bricks-per-m² calculation as well as your mortar volume.
Pre-mixed, bagged mortar removes the guesswork of site batching and gives a consistent yield per bag, which makes ordering more predictable on smaller jobs. Wet, ready-to-use silo mortar suits larger sites where consistent supply matters more than per-bag convenience, though it demands more careful scheduling around delivery windows since it has a limited working life once delivered.
Whichever mix you choose, treat the cement-bags-per-brick heuristics as a starting point rather than a fixed number, since sand moisture content, mix ratio and joint thickness all nudge the real figure. Round up your mortar order rather than down, and keep a small reserve of matching mortar mix for pointing repairs later, particularly on visible elevations where colour matching matters.
Tips for factoring in breakage or damage during transportation and handling
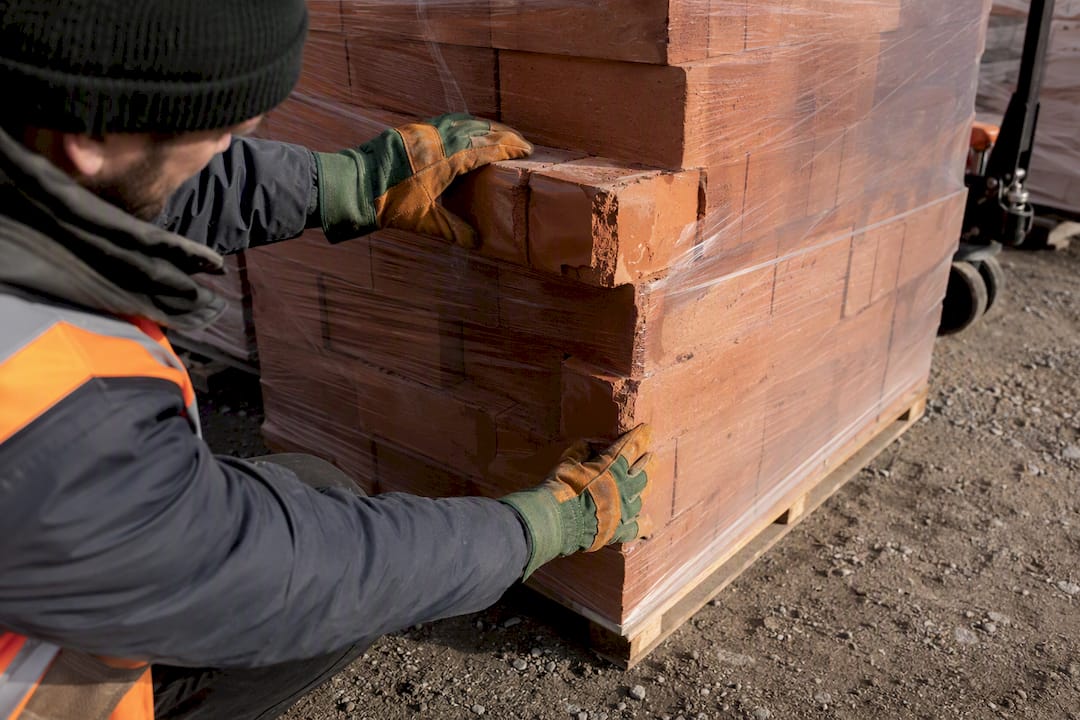
Bricks arrive on pallets shrink-wrapped for transport, but breakage still happens, particularly on longer hauls, rough site access, or where offloading involves more handling than a simple crane-off. Building a small allowance for this into your order, on top of your build wastage percentage, avoids a mid-job scramble for a handful of matching bricks from a batch that may no longer be available.
A sensible approach is to treat breakage as a separate line from cutting wastage. Cutting wastage covers bricks lost to on-site work such as forming openings or reveals; breakage covers bricks damaged before they're even laid. Adding a modest extra margin, rather than folding it into your main wastage figure, keeps your records cleaner if you ever need to query a delivery with a supplier.
Check pallets on arrival before the delivery driver leaves, ideally counting a sample layer rather than assuming the stated quantity is correct. Store pallets on level, well-drained ground away from vehicle routes, and keep them wrapped until you're ready to use them, since exposed bricks left stacked loosely are far more prone to chipping from foot traffic and passing plant.
For repair or extension work where you need to match an existing wall, order slightly more than the calculated figure specifically because sourcing an exact colour and texture match later can be difficult or impossible if the original batch has been discontinued. A few extra bricks held back at the end of a job, stored somewhere dry, is cheap insurance against a future repair needing a batch that no longer exists.
QuantiFlow: a professional route for drawing-based takeoffs
Everything above works well by hand or with a simple calculator for a single wall or a small extension. Where a project involves multiple elevations, awkward returns, or a formal bill of quantities that needs to stand up to scrutiny, the calculation becomes harder to keep reliable using manual methods alone.

QuantiFlow reads construction drawings and produces a draft bill of quantities for a quantity surveyor to review and sign off, giving you a structured starting point rather than a blank page. It's built for quantity surveyors, small builders and architects who need to move from PDF drawings to priceable output without losing the professional judgement that a proper BoQ demands. The platform is still in development, and every draft it produces is meant to be checked, adjusted and signed off by a qualified surveyor before it goes anywhere near a client or contractor.
Plans include Solo and Business tiers with monthly fees, details on the QuantiFlow site, with custom Enterprise pricing available on request, all detailed on the QuantiFlow site. If your workload has outgrown spreadsheet takeoffs and single-elevation calculators, it's worth looking at the plans and seeing whether a drawing-based starting point fits how your practice works. For a broader look at how digital measurement workflows are evolving, this case study on digital takeoff approaches is a useful comparison point.
Sources
For deeper reading on measurement conventions, see NRM2 explained and setting out quantities for residential projects.
- NRM / measurement guidance (extracted)
- UK standard brick calculator (Mix Design Calc)
- TradeCalculator mortar guidance
- Build Journal mortar calculator and guidance
FAQ
How do I calculate the quantity of brickwork needed?
Measure gross wall area (length × height), subtract door and window openings to get the net area, then multiply by the bricks-per-m² figure for your brick size and joint, typically 60/m² for a standard half-brick wall.
How much mortar per m² of brickwork?
Trade calculators put mortar consumption at roughly 0.022 m³ per m² for half-brick work and around 0.03 m³ per m² for one-brick walls, according to TradeCalculator's guidance.
What are brick quantities measured in?
Brickwork is measured in square metres (m²) of wall face area under standard NRM measurement guidance, with the resulting area converted to a brick count using the relevant bricks-per-m² figure.
How do I calculate how many bricks I will need?
Take your net wall area in m², multiply by 60 for a standard half-brick wall, add a 10% wastage allowance, then round up to the nearest whole pallet, commonly 400 to 480 bricks per pallet.
Can software help with brickwork takeoffs?
Simple online calculators suit single elevations, while drawing-based tools such as QuantiFlow read construction drawings and produce a draft bill of quantities for a quantity surveyor to check and sign off on larger or more complex projects.
Recommended
- Concrete quantity takeoff: a practical guide for UK estimators
- Keep Tender Quantities Within ±5%: NRM2 Workflow for UK QS
- Deductions in measurement: rules quantity surveyors must apply
- Role of drawings in quantity measurement: a UK guide
This article is for general information only and is not professional, legal or commercial advice. Quantity surveying decisions should be taken by a qualified professional with reference to the specific project, drawings and contract in question. Content is produced with AI assistance and reviewed before publication. QuantiFlow Ltd accepts no liability for reliance on it.