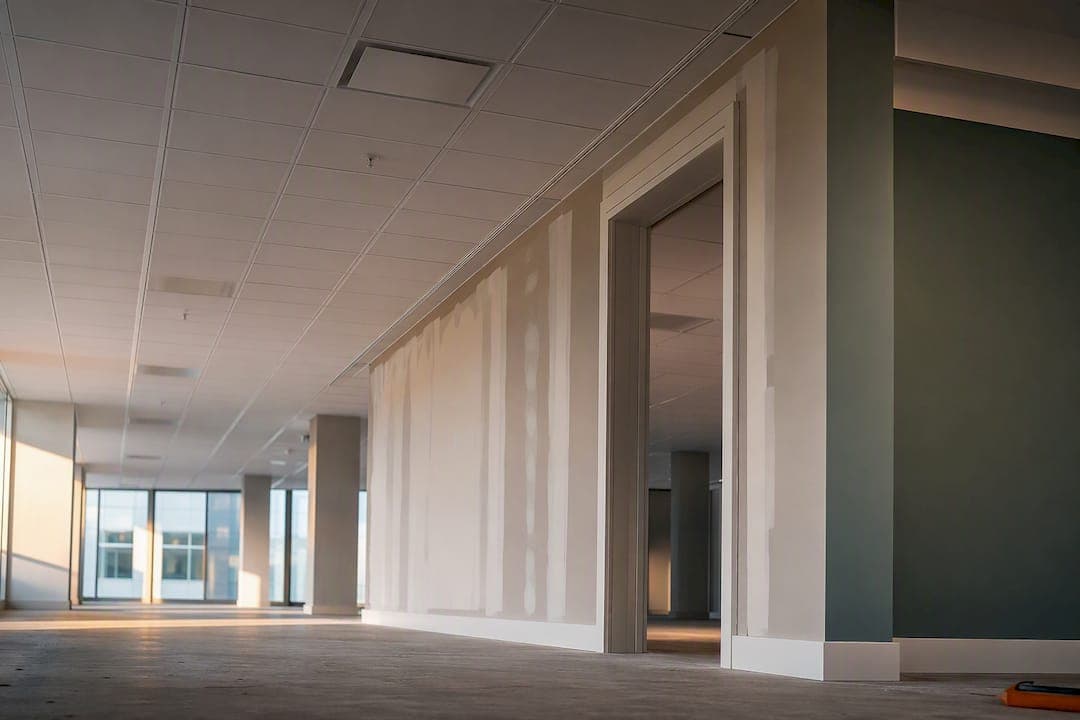
A finishes quantity takeoff measures every net area, length and count of interior finishing work (paint, drywall, flooring, tile, trim, doors and hardware) from architectural drawings, producing quantities ready for pricing and procurement. The recommended approach is a drawing-centred digital workflow: calibrate each sheet, measure against a fixed layer structure, apply waste separately from net quantities, and have a second estimator verify before export. Skip any step and the errors surface at bid stage, not before.
TL;DR:
- Accurate finishes takeoff workflows depend on setting a consistent layer structure, calibrating scales, and verifying measurements before export.
- Errors often stem from missed ancillary items, incorrect deductions, or inconsistent measurement conventions, which can cause significant cost overruns.
- Waste allowances vary by material and pattern complexity, with patterned finishes requiring more generous estimations and detailed rationale.
- Using automated tools like Quantiflow boosts efficiency on repetitive unit types, but human review remains essential for understanding design intent and exceptions.
- A disciplined QA process, including calibration checks and layer gaps review, can catch most errors before costing, saving time and reducing costly rework.
Table of Contents
- What does a finishes quantity takeoff actually cover?
- How do you run a finishes quantity takeoff from start to finish?
- How do you measure specific finishes correctly?
- How much waste allowance should you apply to finishes?
- Which tools actually speed up finishes takeoffs?
- What should a finishes takeoff quality check cover?
- What does a worked finishes takeoff look like in practice?
- Balancing estimator judgement with automation
- Get audit-ready finishes takeoffs with Quantiflow
- Sources
What does a finishes quantity takeoff actually cover?
A finishes takeoff measures quantities, not costs. That distinction trips up junior estimators constantly. The takeoff produces net areas, lengths, volumes and counts, and pricing belongs to a separate stage where labour rates and mark-up get applied. Keeping the two apart matters because a measurement error compounds through every rate you apply afterwards, whereas a pricing error stays contained to a single line.
The scope of an interior finishes takeoff typically includes:
- Wall and ceiling finishes: paint, wallpaper, drywall board and skim coats, measured as net square metres per coat or layer
- Flooring: carpet, vinyl, timber, tile and screed, measured in square metres with pattern and waste noted separately
- Ceilings: suspended grid systems, tiles, bulkheads and perimeter trim, counted by grid module and linear metre
- Trim and millwork: skirting, architrave, cornice and fitted joinery, measured in linear metres
- Doors and hardware: counted as discrete units, with hardware sets (hinges, handles, closers) tallied against each door type
- Cabinetry and fitted furniture: counted by unit or linear metre of run, depending on the specification
Errors in any one of these categories rarely stay isolated. Miss a run of skirting behind a kitchen island and you underorder timber, delay the joiner, and potentially blow the finishes budget by a margin that only shows up when the site team asks why there's not enough material on the lorry. This is why a repeatable, structured takeoff workflow matters more in finishes than almost any other trade category: the sheer number of small line items means small errors multiply fast.
How do you run a finishes quantity takeoff from start to finish?
A finishes takeoff works best as a five-stage sequence: prepare, calibrate, measure, verify, export. Skipping stages to save time is the single most common cause of rework later.
-
Prepare. Review the contract documents and finish schedules before opening a single drawing. Confirm what's included in your scope and, just as importantly, what's explicitly excluded. Cross-check the finish schedule against the architectural plans for contradictions. Note any items marked "by others" so they don't creep into your quantities.
-
Calibrate. Set the scale on every sheet before measuring anything. This sounds obvious, but scanned or exported PDFs frequently carry a drift between the printed scale bar and the actual page dimensions, and that drift compounds across every measurement you take. Build a standard set of layers or a work breakdown structure (WBS) before you start, organised by trade or cost code, so every measurement lands in a consistent bucket from the first sheet to the last.
-
Measure. Apply consistent rules for lengths, areas, counts and assemblies. An "assembly" groups related items, for example a shower wall tile assembly that bundles the tile, backer board, waterproof membrane and grout into one measured unit rather than four disconnected line items. Assembly-based measurement reduces missed ancillary items because the components travel together instead of being measured (or forgotten) individually.
-
Annotate and link. Every measurement should trace back to its source drawing and the specific spec callout that justified it. When a query comes in from the client or a subcontractor six weeks later asking "where did this quantity come from?", you want to answer by pulling up the mark-up, not by re-measuring from memory. Visible linkage between quantity and source sheet turns a defensive scramble into a two-minute lookup.
-
Verify and export. Move each measured item through a status progression: in-progress, reviewed, verified. A second estimator should sign off on anything above a threshold value you set for the project, and that review should be logged, not informal. Once verified, export to a clean format for the pricing team, stripping out working notes and mark-up layers that don't need to travel downstream. For guidance on structuring this into a repeatable standard operating procedure, an audit-ready takeoff workflow gives a fuller breakdown of the checkpoints worth building into your own process.
Pro Tip: Build your layer structure once, as a template, and reuse it on every project. Estimators who rebuild their WBS from scratch on each job lose consistency between projects and make cross-project benchmarking almost impossible.
The temptation on tight programmes is to compress stages three and five, measuring and verifying in one pass. Resist it. A takeoff that's measured and checked by the same person, in the same sitting, catches far fewer errors than one where a second set of eyes reviews it cold a day later.
How do you measure specific finishes correctly?
Each finish trade carries its own measurement convention, and mixing conventions between similar-looking items is where a lot of quantity drift creeps in; understanding the true cost of building a horse arena provides insight into accurate cost calculation and labour estimation that parallels finishes takeoff processes.
Drywall is measured as net area per board layer, with openings (doors, windows, service penetrations) deducted rather than ignored. Fire-rated assemblies often need multiple board layers counted separately, and fire-stopping components at penetrations should be tallied as a distinct line rather than absorbed into the general drywall quantity.
Paint is measured per coat, per substrate. A primer coat and two finish coats on the same wall are three separate quantities, not one tripled figure, because the coverage rates and material costs differ. Deduct substrate areas that won't be painted (tiled zones, exposed brick) rather than measuring the whole wall and hoping the estimator downstream remembers to adjust.
Flooring and tile need pattern and waste treated as separate notes from the net area. Underlayment, bedding compound and grout volumes are additional quantities in their own right, not folded into the flooring area. Ancillary and hidden items like setting materials and membranes are exactly the kind of line that gets missed when a takeoff rushes straight from area to price without pausing on what sits underneath the visible surface.
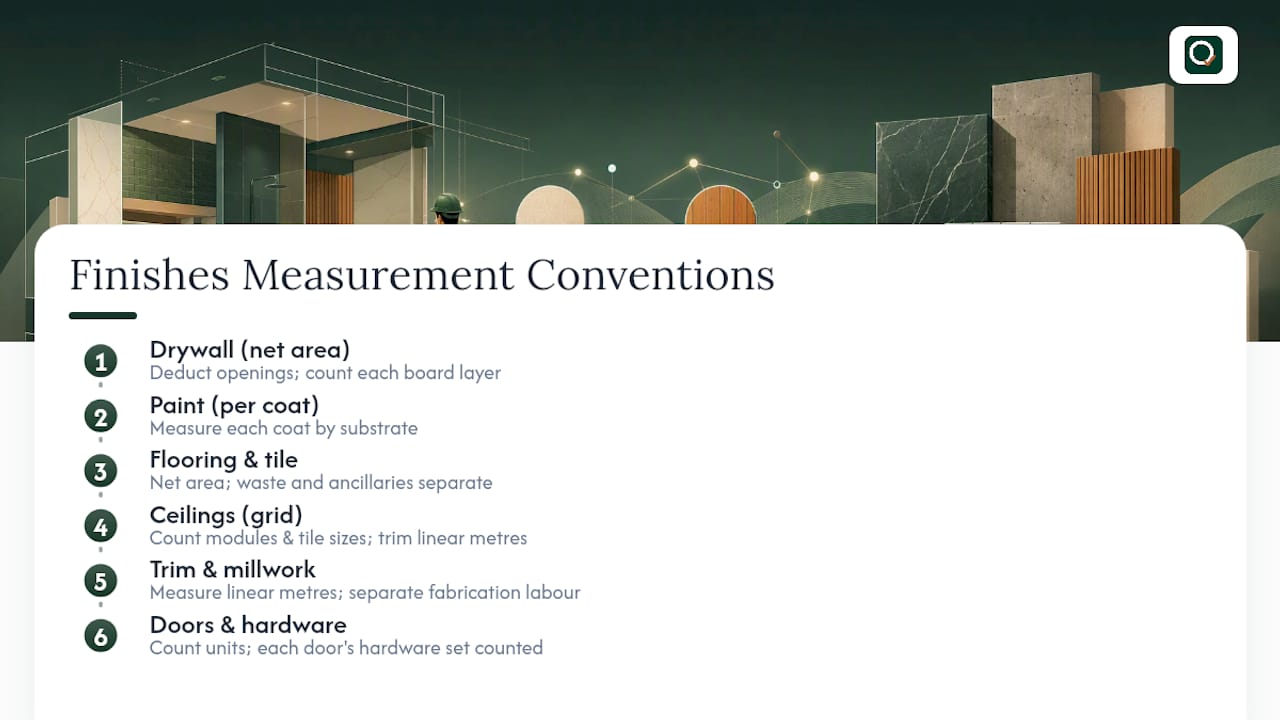
Ceilings are counted by grid module and tile size, with bulkheads and perimeter trim measured separately in linear metres. A suspended grid takeoff that only records the overall ceiling area misses the fact that grid tiles come in fixed sizes, so partial tiles at the perimeter need their own allowance.
Trim and millwork are measured in linear metres, and fabrication should stay separate from installation labour even at takeoff stage. A run of bespoke joinery has a materials quantity (linear metres of timber) and a separate labour consideration that the estimator applies later, not two figures blended into one.
Doors and hardware are counted as discrete units. Each door type gets its own hardware set convention, so a fire door with a self-closer and three hinges is counted differently from a standard internal door with two hinges and a lever handle, even if they look similar on the plan.
How much waste allowance should you apply to finishes?
Net quantity is what's physically installed. Ordering quantity is what you actually buy, and the gap between them is waste. Conflating the two is one of the fastest ways to either under-order and stall a site, or over-order and eat the margin.
Waste allowances vary hugely by material and installation complexity:
- Straight-lay flooring and standard tile: a modest allowance covers cutting loss and breakage
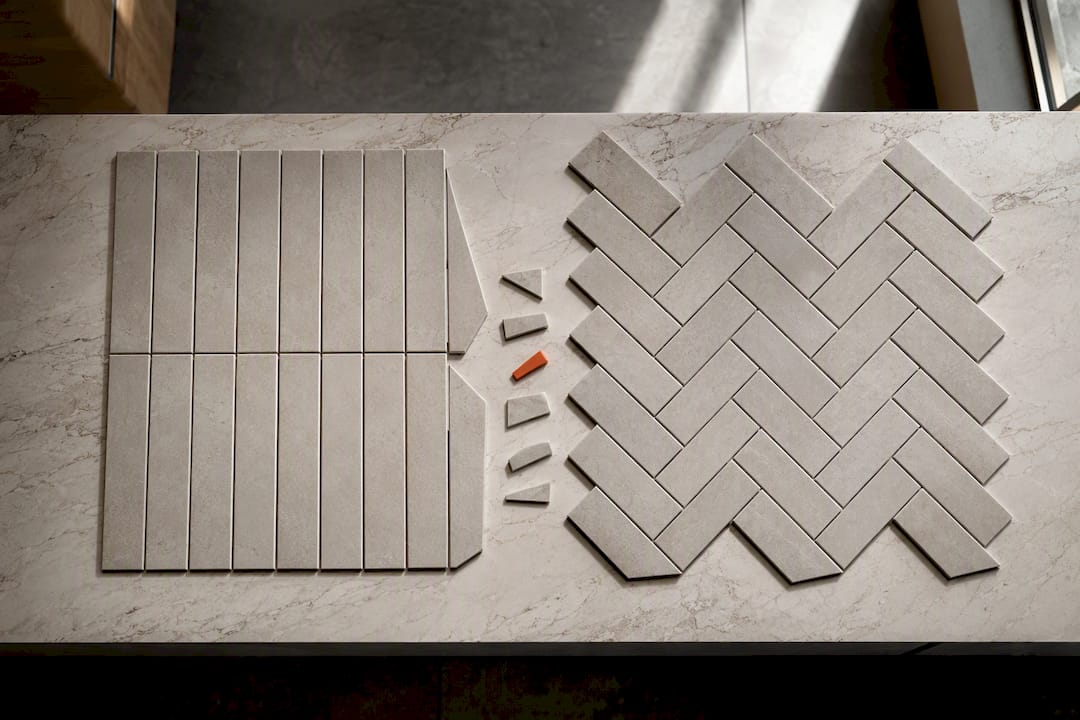
- Diagonal or herringbone tile and timber patterns: a materially higher allowance is needed, because waste on patterned finishes grows non-linearly with layout complexity rather than scaling in step with area
- Complex millwork and bespoke joinery: allowances should be set per project based on the specific detailing, not pulled from a generic table
There's no single universal percentage that covers every project, and any guide claiming otherwise is oversimplifying. What matters is documenting your rationale. If you've applied a heavier waste allowance because the flooring runs on a 45 degree diagonal through an irregularly shaped room, write that down in the takeoff notes. A bare percentage with no explanation doesn't.
Statistic Callout: Pattern-driven waste is one of the few areas where a blanket assumption genuinely fails. A straight-lay tile job and a herringbone job of identical floor area can carry meaningfully different ordering quantities, purely because of how the cutting loss compounds around the pattern's geometry.
Which tools actually speed up finishes takeoffs?
The tools that matter aren't the ones that measure fastest. They're the ones that leave a clear, checkable trail behind every quantity.
Prioritise these features when choosing a takeoff tool or template:
- Calibration controls that lock scale per sheet and flag drift automatically
- Layered markups that separate trades and cost codes visually, so a reviewer can isolate one trade's measurements at a glance
- Assembly support for bundling related items (tile plus membrane plus grout) into one measured unit
- Export formats that hand off cleanly to Excel or PDF without losing the underlying structure
- Revision history that timestamps every change, so a quantity edited after client sign-off is visible, not silent
A well-structured WBS for finishes typically organises by trade sheet and cost code, roughly following CSI division conventions for interior finishes, so each trade's quantities sit in a predictable place regardless of who ran the takeoff. That structure matters more on larger jobs, where three or four estimators might be splitting the finishes package between them.
Manual measurement still has a place on small, simple jobs where the overhead of setting up digital layers exceeds the time saved. But on anything with repeated unit types, whether that's twenty identical apartment bathrooms or a retail fit-out chain, a hybrid workflow (automated first-pass extraction, followed by estimator verification) consistently outperforms either pure manual measurement or unchecked automation. AI-assisted first-pass takeoffs move fast but genuinely need a human review layer to catch spec exceptions and design intent that the software can't infer from geometry alone.
Quantiflow fits into this second category. It automates NRM2-aligned BoQ extraction directly from PDF architectural drawings, cross-referencing quantities against the drawing set and building a traceable audit trail as it goes, while leaving the estimator's professional judgement in control at every review point. It suits SME quantity surveyors and small building firms who need volume and consistency without giving up sign-off authority.
Pro Tip: If you're comparing takeoff software, ask specifically how it handles revision history. A tool that overwrites old quantities silently when a drawing changes is a liability at handover, not a convenience.
For teams organising their own PDF-based workflow before adopting dedicated software, a structured approach to layer management makes the eventual move to automated extraction considerably smoother.
What should a finishes takeoff quality check cover?
A short, disciplined review catches the majority of errors before they reach the pricing team. Run through this sequence before signing off:
-
Recheck calibration on every sheet. Don't assume the first sheet's scale holds for the whole set. Different sheets, especially where drawings have been reissued at different times, sometimes carry different scale factors even within the same package.
-
Scan layer coverage for gaps. Toggle through each layer and look for blank zones where a finish should logically appear but no measurement exists. This catches the "forgot to measure the utility cupboard" class of error that's otherwise invisible until someone asks why there's no paint line for it.
-
Cross-check against the finish schedule and specification. Every room on the schedule should have a corresponding measured quantity, and vice versa. A mismatch in either direction needs resolving before export.
-
Confirm sign-off status. Nothing should leave in-progress status without a named reviewer attached, and higher-value items should carry a second estimator's verification, not just the original measurer's.
The most frequent pitfalls worth watching for: double-counting an area that appears on two overlapping sheets, missing an assembly's ancillary components (the membrane under the tile, the fire-stopping behind the drywall), and misapplying a deduction (subtracting a door opening from the wrong wall, or twice). None of these are exotic mistakes. They're the routine, boring errors that a five-minute layer scan catches almost every time, which is exactly why skipping the scan under deadline pressure is such an expensive shortcut. A dedicated QA checklist for takeoff errors is worth building into your standard operating procedure if you don't already have one formalised.
Pro Tip: Keep a running log of every error your QA process catches over a few months. Patterns emerge fast, and most teams find the same two or three mistake types account for the majority of corrections.
What does a worked finishes takeoff look like in practice?
Take a single one-bedroom apartment unit as the scope, using the floor plan, reflected ceiling plan and finish schedule as the minimal sheet set.
-
Paint area. Wall perimeter measured at 34 linear metres, ceiling height 2.4m, giving a gross wall area of 81.6m². Deduct two door openings (1.8m² each) and one window (2.2m²), leaving a net paintable area of 75.8m² for two finish coats plus one primer coat, recorded as three separate quantities.
-
Flooring. Living and bedroom areas total 42m² of engineered timber, laid straight (not diagonal), carrying a moderate waste allowance for standard cutting loss. Bathroom and kitchen total 9.5m² of porcelain tile.
-
Tile assembly. The bathroom tile is treated as an assembly: 9.5m² of tile, matching backer board, waterproof membrane and grout, bundled as one measured unit rather than four separate lines, following the assembly-based approach that keeps ancillary items from getting dropped.
-
Trim. Skirting runs 34 linear metres matching the wall perimeter, minus door openings, giving roughly 31 linear metres net.
The export-ready quantity table for handover to pricing looks like this:
Every figure here is a net quantity. Waste allowances get applied as a separate ordering calculation once this table reaches the pricing stage, keeping the measured record clean and auditable if anyone needs to trace a number back to its source sheet.
Balancing estimator judgement with automation
Automation earns its place when the work is repetitive and the volume is high, twenty identical bathroom layouts, not one bespoke kitchen. That's where a first-pass extraction genuinely saves hours without meaningfully raising risk, provided an estimator still reviews it.
What automation can't do is read intent. A spec note buried in a schedule, an unusual junction detail, a client's verbal instruction that never made it onto the drawing, these need a person who understands the job. The teams getting the most value from automated takeoffs aren't the ones removing estimator review. They're the ones freeing that review time from repetitive measurement so it can focus on the exceptions that actually matter.
For a small team, the practical next step is modest: pick one repeatable project type, run it through an automated first pass, and measure how much verification time it actually saves before rolling it out further.
— Michael
Get audit-ready finishes takeoffs with Quantiflow
Quantiflow provides a platform that processes PDF drawings into a structured Bill of Quantities efficiently, while allowing the user to retain sign-off control. The platform extracts quantities aligned to NRM2 directly from architectural drawings, cross-references them within the drawing set, and records revisions to keep every figure traceable to its source sheet.

It suits SME quantity surveyors, small builders and architectural practices who currently lose hours to manual measurement on repeatable unit types, apartment blocks, retail fit-outs, standardised house types, where the same finish assemblies appear over and over. Rather than measuring each unit from scratch, you verify and adjust, which is where the real time saving sits. Pricing runs on a live UK rate library, and every quantity exports cleanly to PDF or Excel for handover. If you want to see how it handles a real drawing set from your own project pipeline, you can try Quantiflow and run a finishes package through it before committing to a full subscription.
Sources
- Construction Takeoffs: Complete Guide to Quantity & Material Takeoffs in 2026 | Bluebeam
- Construction Takeoff: What It Is and How to Do One Accurately (July 2026) - Constructable Blog
- Interior & Finish Takeoffs (CSI Division 09) | True Bid Data
- Interior & Exterior Finishes - Aris Estimating