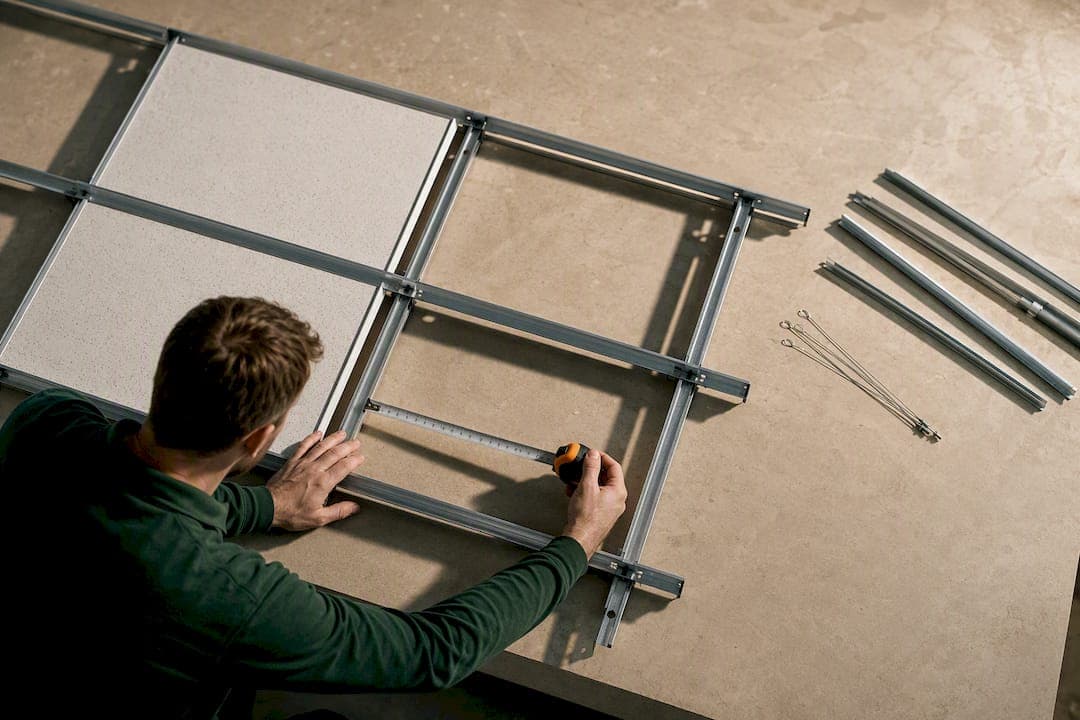
A correct ceiling takeoff gives you three things: an accurate ceiling area, itemised material quantities for boards, tiles, framing and fixings, and audit-ready measurements someone else can check without revisiting site. Start by measuring at ceiling level, not skirting height, and record at least two readings per axis plus multiple ceiling heights before you calculate anything. Manufacturer estimators and a structured takeoff process both help, but the measurements come first.
TL;DR:
- Measuring ceiling dimensions at ceiling level with multiple points per axis prevents errors caused by irregular room shapes and sloped ceilings.
- Including fixture locations, joist directions, and wall measurements from two walls ensures accurate cutouts and hanger placement, reducing rework.
- Wastage allowances significantly impact material orders, especially for tiles versus boards, and should be customized based on project specifics.
- Digital takeoff tools are most effective on multi-room projects, but should be cross-checked against hand measurements for accuracy and defaults.
- Building a detailed handover pack of raw measurements, sketches, and photos saves time and prevents errors during project execution.
Table of Contents
- How do you measure a ceiling for a takeoff?
- Turning measurements into a materials list
- Which tools actually speed up a ceiling takeoff?
- What mistakes cause the most ceiling takeoff rework?
- Worked example: a single-room ceiling takeoff
- What the QuantiFlow team looks for in a reliable takeoff
- How QuantiFlow supports plan-based ceiling takeoffs
- Useful calculators and guides
- Sources
How do you measure a ceiling for a takeoff?
Site measurements are the foundation of every ceiling quantity estimate, and getting them wrong at this stage costs far more than the ten minutes it takes to do them properly. The sequence below works whether you are measuring from a reflected ceiling plan or standing in the room with a laser.
- Measure length and width at ceiling level, not at floor or skirting height, taking readings in at least two places per axis. Rooms are rarely square, and measuring at least two points per wall helps catch discrepancies early.
- Take multiple ceiling height readings spread across the room rather than one in the middle. Older buildings especially can vary by 20mm or more corner to corner, and that variance changes how much you need to trim or shim.
- For vaulted or sloped ceilings, record three values: ridge height, wall height on both sides, and the horizontal run. These three numbers let you calculate the true along-surface length rather than guessing from the horizontal projection, which is where vaulted takeoffs usually go wrong.
- Locate fixtures by measuring from two walls, not one, and note joist direction and spacing where it is visible or shown on the drawing. This matters for hanger placement and for deciding board orientation.
- Sketch the room and annotate every measurement point, then photograph two corners plus one vertical shot up the wall to the ceiling. Professional measuring guidance treats this photo pairing as standard practice precisely because it resolves disputes about what was actually measured.
- Record everything in millimetres if the job is heading to a professional handover. Mixed units between site notes and the office spreadsheet are a common source of ordering errors.
Recording raw figures rather than a single averaged number gives you far better information about an out-of-square room and tells you where the discrepancy needs to be hidden in the finished ceiling.
Turning measurements into a materials list
Once the dimensions are captured, the maths is straightforward, but the wastage percentage you choose has more effect on the final order than most estimators expect.
Ceiling area is length multiplied by width for a rectangular room. For irregular plans, split the space into rectangles and triangles, calculate each separately, and sum the results. Multi-room projects should be tracked as separate line items even where they share a total, because different rooms often carry different wastage rates once cuts and returns are factored in.
- Board or tile count = ceiling area ÷ board/tile area, plus a wastage allowance. Board systems typically require a moderate wastage allowance; grid tile systems tend to have lower wastage due to less cutting, because tiles are cut less often.
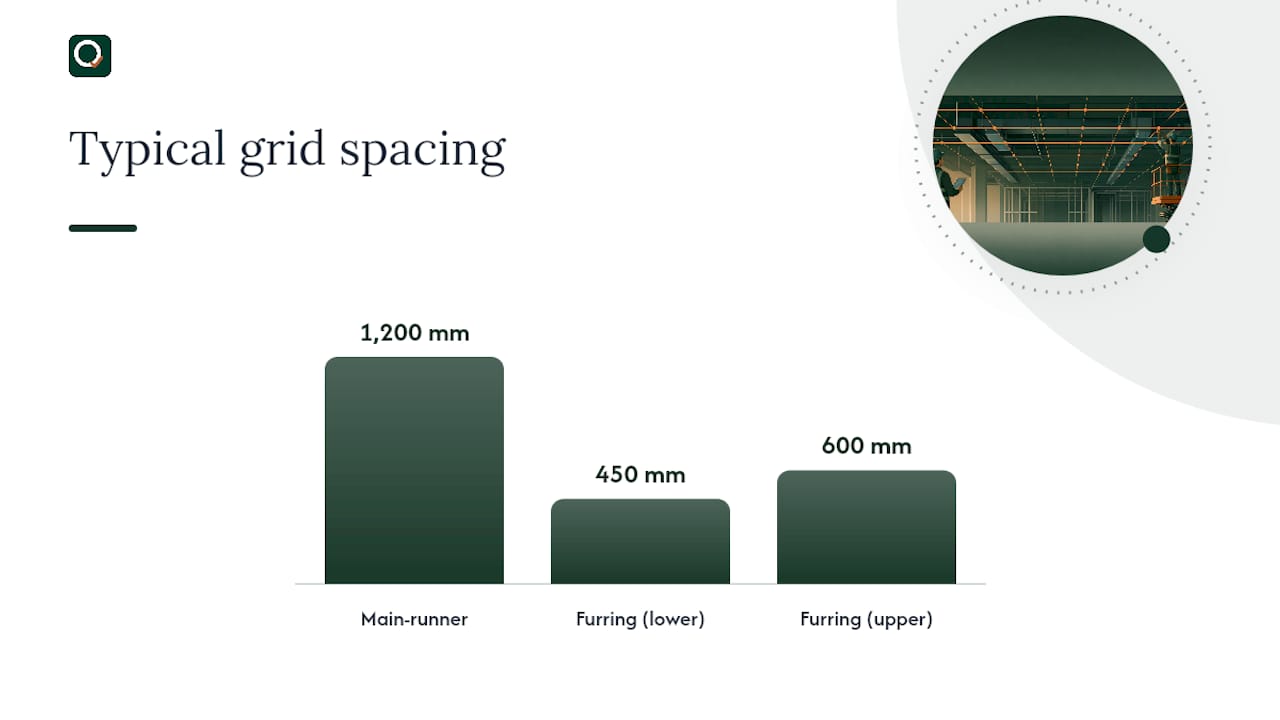
- Main-runner and cross-tee lengths for suspended grids, or channel lengths for board systems, follow standard spacing conventions. False-ceiling calculators commonly use around 1,200mm main-runner spacing and 450 to 600mm for furring or secondary members as preliminary values, though the manufacturer's specification always overrides a generic default.
- Hanger and screw counts derive from that same spacing: divide the runner length by hanger spacing to get a count, then add extra hangers around cutouts, light fittings and service penetrations.
A quick spreadsheet formula an estimator can reuse: Area = L × W; Boards = ROUNDUP((Area / Board_Area) × (1 + Wastage%), 0); Runners = ROUNDUP(Area / Runner_Spacing_Area, 0). That third line adapts easily once you know your grid's spacing values.
Which tools actually speed up a ceiling takeoff?
Tool choice depends on the job's complexity, not personal preference, and the wrong choice on a multi-room bid costs hours you will not get back.
- Laser distance measurers suit solo work and multi-height readings; most models hold accuracy to within a couple of millimetres and remove the need for a second person to hold the tape.
- Tape measures still work fine for single rooms if you use the case-depth addition method or wedge the hook into a corner, but both techniques introduce small errors that compound across a large project.
- Manufacturer or online drop-ceiling calculators are the right call for simple, single-room tile layouts. Armstrong's calculator and USG's material estimators both handle standard tile sizes and grid layouts in a couple of minutes.
- Plan-based digital takeoff earns its keep on multi-room projects and anything needing an audit trail, because it keeps the measurement source traceable back to the drawing rather than a loose set of site notes. Working from PDF layers rather than a flattened plan makes this considerably faster.
Pro Tip: Run your first digital takeoff on a plan you have already measured by hand. Comparing the two outputs is the fastest way to learn where a tool's defaults differ from your own site conventions.
What mistakes cause the most ceiling takeoff rework?
Most rework traces back to a handful of repeatable errors, and every one of them is avoidable with a five-minute QA pass before the takeoff leaves your desk.
- Taking one height reading and assuming it applies everywhere. Always record four or five points; a single reading hides slope and settlement that shows up later as a fitting problem.
- Measuring from skirting or floor level instead of ceiling level. The two figures are rarely identical, and using the wrong one skews every board count that follows.
- Rounding too coarsely. Decide on a team convention, either the nearest 1/8 inch or the nearest millimetre, and stick to it across the whole project rather than switching between rooms.
- Ignoring joist direction and fixture position. Mark fixtures from two walls and note joist orientation on the sketch; guessing here creates hanger and cutout errors that only surface on install day.
Pro Tip: Build a short handover pack for every takeoff: raw measurements, the annotated sketch, site photos, who measured, the date and time, and which device was used. It takes minutes and saves far more time when someone questions a figure three weeks later.
Worked example: a single-room ceiling takeoff
Take a room measuring 4.5m × 3.6m with a ceiling height averaging 2.4m across five readings, using a standard 600mm × 600mm suspended grid.
Ceiling area is calculated by multiplying length and width. Based on typical wastage and spacing guidelines, estimators can calculate tile counts, runner lengths, and hanger quantities for a room this size.
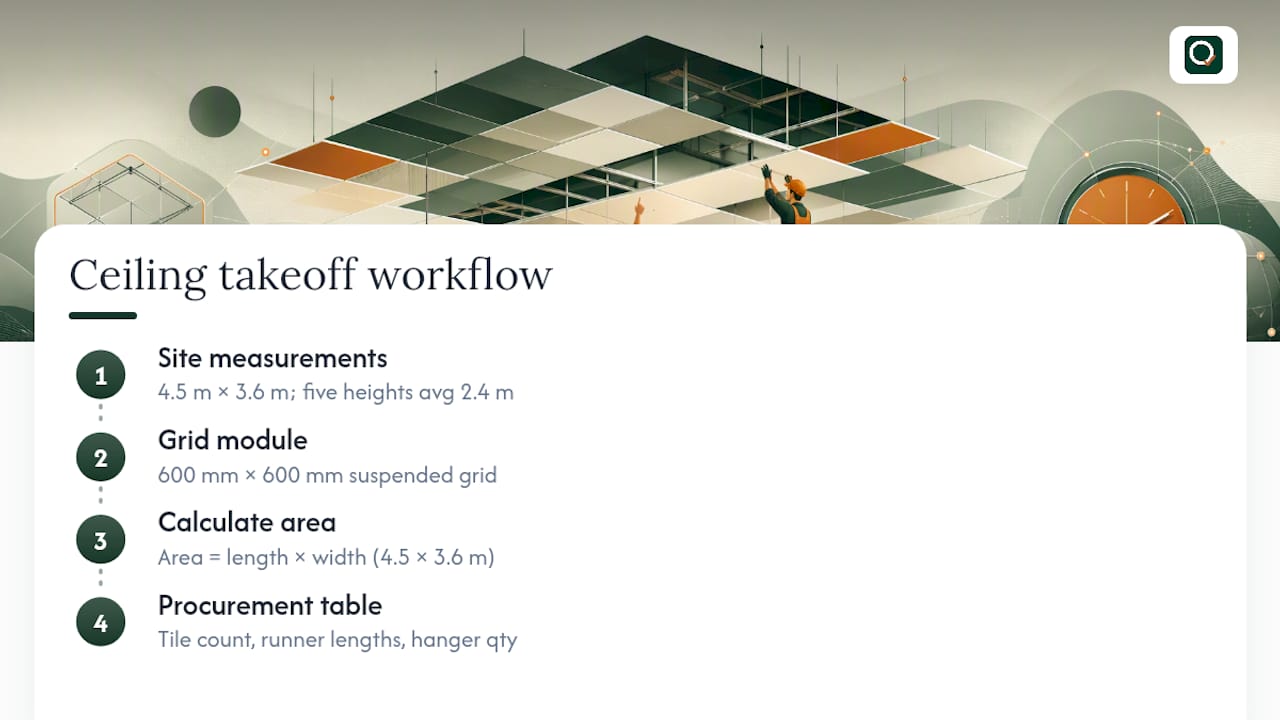
That table is what goes to procurement, not the raw site notes.
What the QuantiFlow team looks for in a reliable takeoff
Automated tools help most when they speed up the mechanical parts of a takeoff, area calculation, board counts, spacing maths, while leaving the estimator's judgement intact on anything ambiguous in the drawing. What matters is whether the output stays editable, whether every figure traces back to a source measurement, and whether it exports cleanly into the format your team already works in. Automation earns trust by showing its working, not by hiding it. A manual check still belongs on any reading that looks unusual, particularly heights, slopes and fixture positions.
— Michael
How QuantiFlow supports plan-based ceiling takeoffs
Manufacturer calculators handle a single room well. Where they run out of road is the multi-room bid, the drawing set with dozens of rooms and mixed ceiling types, and the need for a quantity trail someone else on the team can check. Some digital takeoff platforms read PDF architectural drawings directly, cross-reference the measurements against the plan, and produce structured quantities you can export straight into a Bill of Quantities.

For a ceiling takeoff specifically, that means importing the drawing, letting the platform extract the ceiling geometry and dimensions, verifying the figures against your own site readings, and exporting the finished quantities to PDF or Excel for pricing. Every quantity stays editable and traceable back to its source, so professional judgement still has the final word. If your ceiling takeoffs currently eat up half a day per project, it is worth trialling Quantiflow on a plan you have already measured by hand and comparing the two outputs directly.
Useful calculators and guides
- USG Material Estimators
- Armstrong Drop Ceiling Calculator
- TryBuildCalc False Ceiling Calculator
- As-built drawings guide
Sources
- Material Estimators | USG
- Drop Ceiling Calculator and Layout Tool | Armstrong
- False Ceiling Calculator - Boards, Channels & Cost | TryBuildCalc
- How to measure your ceiling for faux beams | Elite Ceiling Designs